
Knowing where you are is the first step toward taking proactive steps in your discipleship.
Access to this feature is limited to those who are registered as Primary Group Leader or Lead Pastor as one of their roles.
The Next Steps feature in the Discipleship Pathway Assessment is a way for you to provide specific help to individuals using your passcode on what to “do next” after completing the assessment. This is optional and most groups don’t see a need to use this feature. It is a helpful resource if your group has planned specific classes, events, or content that you want to point your group to.
When developing Next Steps try to keep in mind very basic, simple, and realistic things people can do that will not only help them grow in a specific area but will also encourage them. Making these too detailed or cumbersome may have an unintended consequence of discouragement and a sense of defeat. Once you have the text of your Next Steps prepared, you are ready to enter them into the Discipleship Pathway Assessment tool.
We recommend creating and saving them in a document on your computer, so that all you have to do is cut and paste once you are in the Discipleship Pathway Assessment tool.
- Log into your Discipleship Pathway Assessment account
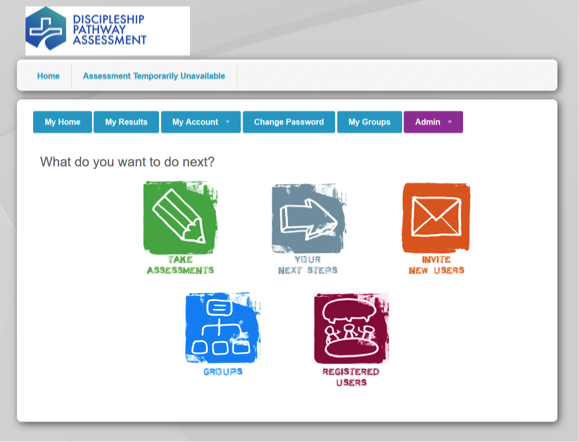
- On the Home Page, click on the YOUR NEXT STEPS icon.
- On the Your Organization’s Next Steps page, you can begin to add customized content for each of the eight DPA signposts.

- To begin, click the Create New Next Step button.
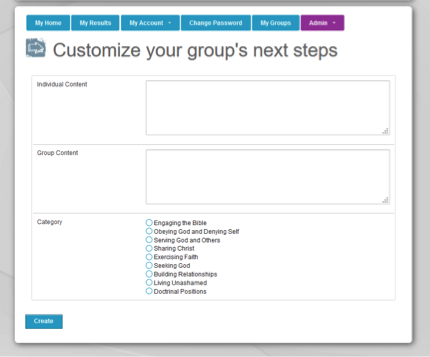
- Select which Category you would like to begin with, and then add content to the Individual Content text box (shown in individual reports) and the Group Content text box (shown in your group reports). It will not save if you have not done each of these steps: Select Category, add Individual Content, add Group Content.
- Click Create button.
- Continue with each of the other attributes.